How to Set Up & Configure Squid HTTPS Proxy on Ubuntu, Windows, & Linux

Proxies and caches have proven to improve the internet user experience when properly used. Recent devolutions in the internet industry have seen hackers and unwanted guests use complex tricks to better any internet network. High security is achieved by modulating and improving security protocols by integrating proxies. Proxies like the Squid offer high versatility, making them a must-have for any internet user. To provide fast speeds and security, understanding how to set it up and configure is vital.
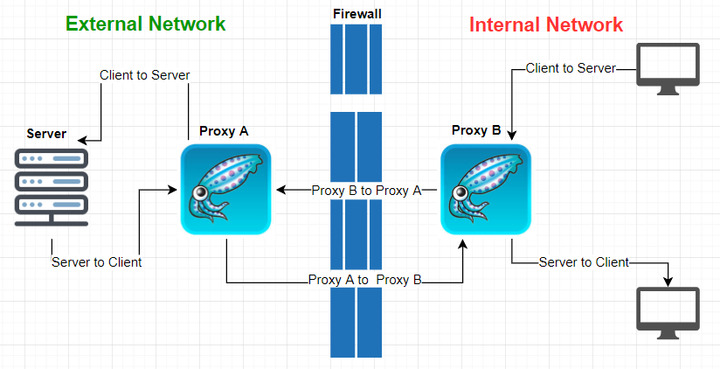
Network administrators prefer better service delivery, so they choose to set up a Squid proxy. How? When using your internet and seeking a web page, it goes through the proxy server, an intermediary between the desktop and the internet, where it finds the appropriate resource and delivers it to the user.
Below is an accurate squid tutorial on setting up, configuring, and installing this proxy server in the various components.
What is a squid HTTPS Proxy?
Squid’s ability to cache frequently requested pages and speed the web traffic and load times while reducing bandwidth makes it a more important tool for your network. Commonly referred to as a stable, popular, open-source HTTP proxy. Squid proxy is a versatile tool used across Linux, Windows, and Ubuntu
The Squid proxy is an excellent solution to various proxy and caching server needs. It can provide scales from the branch office to enterprise-level networks while maintaining extensive, granular access control mechanisms and monitoring critical parameters. Always choose a computer system configured with a large-capacity memory.
3 Ways to set up and configure a squid proxy server.
Squid proxy servers are always installed separately from the original content. Though the systematic setup process varies with the different components, they all follow a basic setup procedure. Firstly, to install the squid proxy, you must update your server and test whether it is running.
Setting up of the Squid proxy can be accomplished through the following:
- Addition of permitted sites – go through the permitted sites through the web proxy when configuring, as they are part of the Access control list (ACL). Squid proxy only caches and plays proxy for only allowed sites; thus, it accepts the setup request. Proceed to the list of sites and input the code. When encoding is done for all, restart and check the status afterward.
By using open ports, the control list can create a passageway for the other sites not defined or placed in the list.
- Blocking websites – even when configuring a network system is right, blocking access to several websites can achieve the same result. Make a folder that will restrain the restricted sites. A code will prompt you when all the listing and blocking are done. Additionally, you can create a list of blocked keywords and limited access restrictions will come into play. Always remember to save the list and restart for confirmation.
- Configuring additional authentications – for added layers of security, you can use the HTTPS tools. This allows a deeper configuration allowing for password allocation to the proxy. Ensure you assign the proxy as the administrator to avoid being locked out.
How to set up Squid HTTPS proxy on Ubuntu
Squid is a stable proxy that functions pretty well with Ubuntu. Below are ways how to successfully install and configure Squid on Ubuntu. Some vital needs for proper configuration include
- An Ubuntu 20.04 server
- A non-root user with Sudo privileges
- Text editor, i.e., Nano
- The apt package installer (by default)
- Terminal window command line
Step 1: update software repositories
The squid package is included in the software repositories. To install, use this command

Always ensure your software is up to date for smooth operation.
Step 2: install the squid proxy
To get the Squid proxy onto Ubuntu, run the following command

You will receive a prompt for confirmation. Enable the start on system boot and check the status.
Step 3: configure the squid proxy
To find the squid proxy configuration file, follow /etc./squid/squid.conf.
Using the text editor, open the file with the command:

Proceed to see the http_port option set to Port 3218 which transmits TCP traffic. Change your port setting here if it is configured for traffic on other ports. To prevent modifications of your requests and responses, you need to set the proxy mode transparent. Use “http_port 1234 transparent” to change it.
Go to http_access deny all option and configuration that blocks web traffic. It should be altered to “Http_access allow all”.
Select the visible hostname option. Indicate any name you wish the server to present to anyone wishing to connect.
Then, the Squid service should be restarted by using this command:

When done, shift to the client machine, then launch the web browser. Follow these steps to locate (Menu > Options > Network Settings > Settings). To enable Manual proxy configuration, click on the radio button.
If you have indicated a hostname, you should enter the relative designated port. If not, try using the hosting IP for the system.
How to set up and configure squid HTTPS proxy on windows
Squid is a versatile proxy provider compatible with the windows operating system. To properly set up Squid on Windows, follow these steps:
- 1. Download the squid proxy from the squid installer and install the proxy.
- 2. Click on the Squid for Windows tab in the menu and select stop the squid service.
- 3. Proceed to the squid installation folder, i.e. C: /Squid/bin, and run the command. This enables the creation of swap directories for cache
- 4. Click the squid window icon and select open the squid configuration.
- 5. Change the http- access deny all with http- access allow all
- 6. Enable disk caching by adding the following command

Note that you can change the destination of the cache directory based on said preferences. Always note the path format in the command. Additionally, it is imperative to note that the first digits represent the total cache size and are susceptible to change. The second number represents the first-level sub-directories, and the third digits represent the second-level sub-categories in the cache directory.
- 7. Save and close the configuration. On the Squid for Windows tab, select start the squid service
- 8. Run the program to see whether it is fully functional.
How to set up and configure squid HTTPS proxy on Linux
The installation and configuration are handled from a command protocol, so locate your terminal space and start typing
- 1. First, update the apt. Through the terminal opening, issue the sudo apt-get update command. Proceed to “run an upgrade” command. This will automatically upgrade the kernel and proceed to reboot.
- 2. Once all the updates/upgrades are done, set up Squid by inputting the following:

Automatically dependencies will soon be located, but only the necessary ones.
This way, the installation is done. To successfully configure a basic server, follow the steps below to the latter.
Configuration
The configuration is controlled in the /etc/squid/squid.conf. To configure a server, you need to uncomment the following:

To locate that code line, use this command:

Using the command sudo nano /etc/squid/squid.conf, locate Squid. conf file for editing, find the line, and eliminate the # character.
Proceed to find the following code line:

The results will contain those of various IP schemes, so identify the one matching your network and change it to suit your requirements.
If you proceed to run your network, for instance, 231.4679.2.0/3675.311.6759.0 network. Your local net configuration will be like this:
acl localnet src 231.4679.2.0/3675.311.6759.0
Using this command, restart the squid service:

After achieving that, you will get a basic proxy server and an IP address of the system Squid was set up on.
Tips to note during the setup process

Setting up the Squid proxy is a simple process for those familiar with network configuration. For those not well involved, below are tips to follow when setting up this proxy.
- 1. Always make a copy of the original file: Much like editing, it is essential to have layers of previous copies to note the dissimilarities. By this, you will possess an original reference. It is easy to highlight the differences or mistakes in the newer version.
- 2. Remember to rotate the log files constantly for better proxy performance.
- 3. Carefully label your ACL: When domains share the same name, the proxy eliminates the possibility of functionality. This allows for added security and protection of the squid proxy against counterfeit domains.
- 4. Limit the downloadable size: Always indicate the maximum allowable size for downloads. The limit applies to all users and all file types but can also be specified to a user.
Benefits of using Squid HTTP proxy
Squid HTTP proxy is becoming a much-preferred proxy for many network users. The benefits of using the Squid proxy include the following:
- It prevents duplication requests for outgoing resources over slow WAN links
- It makes the process of logging and filtering an easy procedure, as all traffic is directed there
- It allows for selective authentications and allows tracking of access
Squid benefits are well reaped when the application consists of multiple users/systems on a network that will pull from its cache.
These days the benefits may appear to be less because:
- In earlier times, the WAN speeds were much lower than now.
- dynamic content is the most preferred content type for websites
- Websites heavy on AJAX/XHR/Web sockets for interactions – very common now – do not generate much cacheable traffic.
- Media sites consume many caches.
- The deployment of certificates to each browser makes HTTP uncacheable and thus needs a MITM setup.
Squid proxy is an overdo for a single user unless it is used for logging facilities or purposefully denying direct Internet access.
Conclusion
Web proxies are gaining more applications as time goes by. More people now understand its benefits, making it a highly sought-after tool for those seeking added online security and a better internet experience. For those that want both proxy and cache services, then the Squid proxy is your tool. There is no need to install separate servers to gain the benefits of a single Squid proxy.
Applying Squid proxy is very beneficial for networking. By implementing the Squid proxy system, administrators can easily gain the upper hand in controlling the network traffic and implementing policies and rules. Additionally, setting up and configuring the Squid proxy is easy and very well-documented.